

Comprehensive Venting Systems Guide for Plumbing
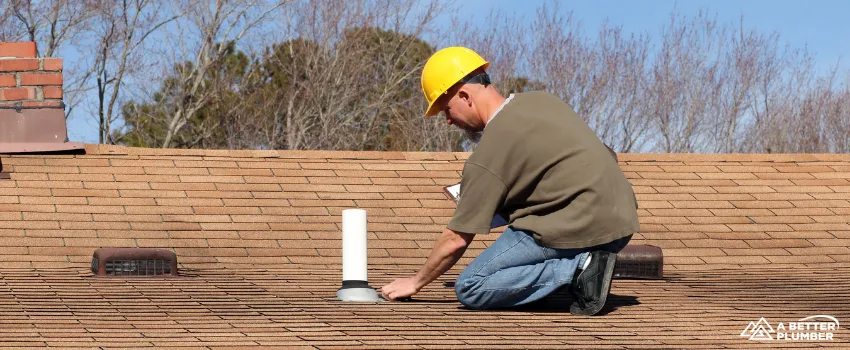
Table of Contents
- Why Plumbing Venting is Necessary
- How Plumbing Venting Works
- Plumbing Vent Direction
- Plumbing Vent Distance from Pipes
- Venting Systems Guide for Plumbing: What You Need to Know
- Step 1: Understand your local plumbing code requirements.
- Step 2: Create a plumbing venting plan.
- Step 3: Start the vent at the most upstream fixture.
- Step 4: Install the vent pipe.
- Step 5: Connect the vent pipe to the main vent or vent stack.
- Step 6: Continue venting for all fixtures.
- Step 7: Consider alternative venting options if needed.
- Step 8: Test the venting system.
- Step 9: Seek the assistance of a professional plumber.
- The Bottom Line
- Get expert help for your plumbing needs!
Plumbing venting is an essential part of any plumbing system. It allows air to enter the pipes, ensuring smooth drainage and preventing clogs. On the other hand, plumbing systems are designed to provide a reliable water supply and efficient drainage. However, without knowing how to vent plumbing effectively, they can become a source of inconvenience and even a health hazard.
In this venting systems guide for plumbing, we will discuss the importance of proper venting, its benefits, and some standard venting methods used in plumbing systems. So, if you’re wondering how to vent your plumbing effectively, keep reading!
Why Plumbing Venting is Necessary
The answer lies in understanding the nature of sewer gases. These gases, which include harmful substances like methane, can accumulate in the drainage system and create pressure. Without a vent, this pressure can build up, leading to various plumbing issues such as:
1. Slow Drainage
When sewer gases accumulate, they can restrict wastewater flow, causing sinks, toilets, and other fixtures to drain slowly.
2. Gurgling Sounds
A blocked vent can create a vacuum effect, resulting in gurgling sounds as air is pulled through the traps in the plumbing system.
3. Foul Odors
The presence of sewer gases can cause unpleasant smells to permeate throughout the building.
4. Overflow
In extreme cases, the pressure from trapped sewer gases can cause wastewater to back up and overflow into sinks, showers, or bathtubs.
How Plumbing Venting Works
Plumbing venting works by allowing fresh air into the drainage system, which balances the air pressure and prevents the formation of traps. Traps are U or S-shaped pipe sections that hold a small amount of water, creating a seal. This seal prevents sewer gases from entering the building through the fixtures.
When a plumbing system is properly vented, the vent pipe acts as an open channel for air. It equalizes the air pressure in the drainage system, ensuring that water flows smoothly through the pipes. The vent also serves as an outlet for toxic fumes, directing them safely above the building and away from the occupants.
It’s important to note that the effectiveness of a plumbing vent relies on its proper positioning and connection to the drainage system. The vent should be located in a way that allows it to function efficiently, avoiding potential issues such as:
1. Proximity to Windows and Doors
To prevent sewer gas odors from entering the building, a vent should be positioned away from windows, doors, and other areas where gas can quickly reenter.
2. Distance From Obstructions
The vent should be clear of any obstructions, such as overhanging branches, to facilitate the free flow of air.
3. Height
The vent should be tall enough to discharge sewer gases above the building’s roof but not so tall that it creates problems with strong winds or affects nearby structures.
Plumbing Vent Direction
A plumbing vent does not necessarily have to go straight up. While it is common for vents to run vertically and extend through the roof, there are alternative venting methods available, including:
- Horizontal vents: These vents run parallel to the building’s floor and connect to a vertical vent or vent stack.
- Air admittance valves (AAVs): AAVs are mechanical devices that can be installed in place of traditional vents. These valves are designed to allow air into the drainage system and prevent the escape of sewer gasses.
Each alternative venting method has its specific requirements and limitations, so it’s important to follow local plumbing codes and regulations when considering these options. While alternative vents can be more flexible regarding their placement, they must still achieve their intended purpose of ensuring proper air circulation and effectively preventing sewer gas entry.
Plumbing Vent Distance from Pipes
The distance between a plumbing vent and the pipes it serves can vary depending on the local plumbing code. In general, the vent should be as close as possible to the fixtures it serves. This proximity helps ensure the vent can effectively equalize air pressure and prevent sewer gas entry.
However, there are some common guidelines to consider:
- The vent should be within 5 to 6 feet of the fixture drain it serves.
- If a fixture is located further from the vent, it may require an individual vent or an additional branch vent connecting to the main vent.
- Fixtures on upper floors often have their own vents, which extend to the main vent or vent stack through the roof.
It’s important to note that this venting systems guide for plumbing is not absolute, and the specific requirements for vent distances can vary. Local plumbing codes may have their own regulations, so it’s always best to consult a professional plumber when planning the layout of your plumbing venting system.
Venting Systems Guide for Plumbing: What You Need to Know
Venting is a crucial aspect of any plumbing system. Properly installed vents can ensure the system’s smooth operation and prevent sewer gas-related issues. Here’s a step-by-step guide on how to vent plumbing:
Step 1: Understand your local plumbing code requirements.
Before beginning any plumbing project, familiarize yourself with the specific venting requirements outlined in your local plumbing code. These codes dictate the acceptable venting methods and materials you can use for your project.
Step 2: Create a plumbing venting plan.
Once you’re familiar with the code requirements, the next step of this venting systems guide for plumbing is to create a venting plan for your plumbing system. Consider the locations of all the fixtures and identify the best positioning for the vent or vent stack.
Step 3: Start the vent at the most upstream fixture.
In your plumbing system, start the vent at the most upstream fixture. The upstream fixture is typically furthest from the main drain or sewer line.
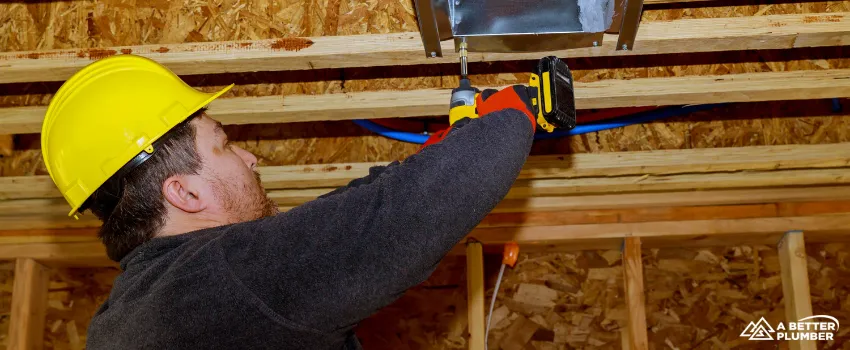
Step 4: Install the vent pipe.
Using the specified vent pipe material outlined in your local code, install the vent pipe. This pipe should run vertically from the fixture’s drain and extend through the roof or connect to an alternative venting option.
Step 5: Connect the vent pipe to the main vent or vent stack.
If you have multiple vents in your plumbing system, connect the vent pipe from the upstream fixture to the main vent or vent stack. The main vent or vent stack is the primary vertical vent that extends above the roof.
Step 6: Continue venting for all fixtures.
Continue the venting process for all the fixtures in your plumbing system. Each vent pipe should connect to the main vent or vent stack to ensure proper air circulation and pressure equalization.
Step 7: Consider alternative venting options if needed.
If your plumbing system layout presents challenges for traditional venting, such as fixtures located far from the main vent, consider alternative venting options like air admittance valves or horizontal vents. Ensure that the alternative venting method you choose complies with the requirements set by your local plumbing code.
Step 8: Test the venting system.
Once all the venting components are in place, testing the venting system is essential. Run water in each fixture and check for proper drainage. Additionally, inspect the vent pipes for any signs of leaks.
Step 9: Seek the assistance of a professional plumber.
Venting can be a complex aspect of plumbing, so if you’re unsure about any step in this venting systems guide for plumbing, it’s always best to seek the assistance of a professional plumber. They have the expertise to ensure your venting system is installed correctly and complies with the local plumbing code requirements.
The Bottom Line
Proper venting for plumbing systems is crucial for maintaining the overall functionality of a building’s plumbing. It alleviates the risks associated with sewer gas buildup, such as slow drainage, gurgling sounds, and potential overflows.
While traditional vents usually go straight up through the roof, alternative venting methods like horizontal vents and air admittance valves are also available. The distance between a plumbing vent and the pipes it serves should be within 5 to 6 feet, but specific requirements may vary according to local plumbing codes.
To ensure you know how to vent plumbing correctly, it is crucial to understand the local plumbing code, create a venting plan, start the vent at the most upstream fixture, and connect the vent pipe to the main vent or vent stack. Testing the venting system is also essential, and seeking the assistance of a professional plumber is recommended for complex projects.
Get expert help for your plumbing needs!
While understanding this venting systems guide for plumbing is useful, it’s always best to leave the job to professionals. If you’re facing any plumbing issues, don’t hesitate to reach out to our experienced team of plumbers at Absolute Electrical Heating and Air!
We provide quality plumbing services, including repairs, installations, and maintenance. Our skilled plumbers are well-versed in handling various plumbing problems, ensuring efficient and long-lasting solutions. If you need reliable plumbers in Thornton or the surrounding areas, contact us today!

CONTACT US
Request Service


Save Every Year with an Absolute Advantage Membership
Expert Annual System Safety Inspections & More
- Priority service
- Waived dispatch fees
- Yearly furnace, A/C, & electrical system inspections
- 10% discount on repairs and additional diagnostic services
- Up to $500 off HVAC & electrical panel replacements